The story continues...
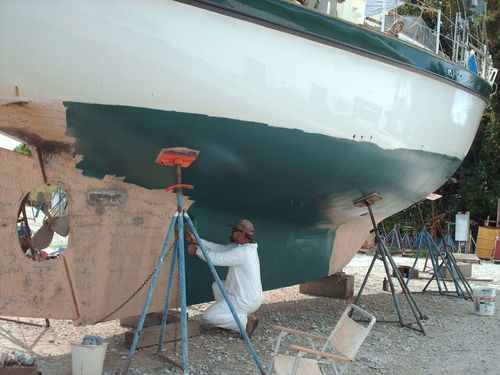
After all the hull repairs and sanding, the hull needs to be protected with paint. (The inside of the hull is still waiting to be painted over a year later. That will be the last thing before installing the all tanks under the floorboards.) |
|

First a zink paint to sort of galvanize the boat. All the paint was bought at a lumber yard where all the shrimp boats buy their paint, dirt floor but less than half the price of other places.
The Summerville Lumber yard, just north west of Charleston is that place I found for inexpensive hull paint.
|
The 2nd coat is an epoxy to seal the hull and separate the zink from the copper antifouling bottom paint.
I pulled off the prop to check the key, shaft bearing and seal. I hope to not be back "down" here for a long time, so I tried to check everything. |
|
|
|
The makeshift prop puller, almost eveyrthing requires a special tool I don't have. I enjoy coming up with the creative solutions to these problems.
Remember to click on a picture if you want a larger view, use back key to come back. |
I actually put on a couple coats of the epoxy till it was all used up.
I did that with all the paint, it doesn't do any good getting old in the can. |
|
|
|
Now it's time for the copper based bottom paint. Note the long handle stiffner, a piece of PVC pipe.
|
It's starting to look real good, you can imagine how happy I am getting at this point.
|
|
|
|
I had some blue copper bottom paint, so I put it on after the first coat of black. The paint is supposed to be ablative, when the keel turns blue I've got one more coat left.
|
The bolt pattern for the zink ablate corrosion anodes was foreign. I made up adapters from welded and drilled steel straps so I could use inexpensive and available standard ones.
I painted over the bolt area so that hopefull the other areas wear away first. That way they don't fail at the bolts first and fall off. 20/20 hindsight, I probably shouldn't have used ablative paint for that. Oops, the thought was at least there, and I'm sure it won't hurt. |
|
|
|
It's ready for the water now. The time crunch is now off, but the work is only just beginning.
I'm in great shape, I've been up and down that ladder about a thousand times in 7 weeks. No lie, 50 days and at least 20 times a day. Pretty good exercise even ignoring all the other work. |
This is the moment we have all been waiting for.
Now did I remember to check all those seacocks. I personally think there should only be two, one inlet and one outlet. |
|
|
|
I had to guess at the waterline, both height and angle, not too bad.
Time to finish the engine plumbing and do some electrical system figuring out and then motor downriver to an anchorage and then a few weeks of work to put enough of the interior equipment together to make the trip to Florida. |
Some champagne for the bow, don't want broken glass in the water.
|
|
|
|
The rest for the captain, don't want the shrimp to get drunk....
Actually it took me a day to finish it, with dinner and lunch. |
I moved the boat downstream and anchored behind Crab bank at the mouth of Shem Creek, Charleston.
And the story continues with a whole new bunch of friends met at Shem creek marina for the next month or so. |
|

